black text
THIS SITE IS A WORK RETROSPECTIVE....CLICK HERE FOR MY NEW WEBSITE

BLACK TEXT

Sunday, November 29, 2009

Bringing it home


After the de-installation of my SITE work it gets lugged back to Water street for storage. Won't fit in the apartment so it's currently hanging out downstairs until the landlord tells me to move it elsewhere.

Thursday, November 26, 2009

Video of installed work

StillMoving from Emily Hlavac-Green on Vimeo.

SITE Exhibition Opening Night


Sneak peak at my work through the velvet curtain


business cards front and back


Thank you to everyone (and there are a lot of you) who have helped to make this work successful.


Viet Tieu and I


Some of the photography class photo with Alex in Kansas via Mishca's artwork.
From left: Viet, Alex, Me, Jules, Jess.

Monday, November 16, 2009

StillMoving - important blog bookmarks

06.03.09Disillusions first experimentation with layered transparency
25.03.09Merging Time layered frames from The Matrix
22.05.09Jad Oakes preserving time
17.06.09Layered Blue flattened time lapse
31.08.09Lenticular Odessa experimentation with movement/3D
10.08.09Cups and orange Lenticular animation to give illusion of 3D space


Wall statement and finished installation

“Photography is truth. And cinema is truth twenty-four times a second” Jean-Luc Goddard

Devoid of any actual moving image, StillMoving rests in the space between cinema and photography, and reflects Deleuze’s theory of the time-image; ‘an image in which time ceases to be subordinate to movement and appears for itself.’ The movement stems from action, rather than relying on a motion picture; and becomes a still image where movement is propelled by the viewer.
Focus is taken away from the cinematic and given back to the photographic.

An image may only ever be a representation; never the actual thing it is depicting, never the ‘truth’ as it was once believed to be. Perhaps the only actuality to which the image can be assigned is its indexical factor; that it is no more ‘real’ than the silver emulsion on paper, or the pixel on a screen. StillMoving aims to highlight this falsified reality.

Final touches


lifting the frame with photographs into place in the wall setting.

putting up curtains around room. this was something i didn't initially anticipate, though it made a huge difference in the end. the room becomes a cinema.

plans

Sunday, November 15, 2009

Construction worker

Today I have sawn, sanded, drilled, nailed, lifted, stapled, measured, leveled, broken and fixed. Still too scared to take the full backing paper off until it is absolutely necessary, I got the first glimpse of about 1/8th of my work at 1am this morning.

Issues at this stage:
*Costly and time consumingly beautiful 6mm clear acrylic frame for prints didn't work as planned, so had to be constructed from timber, then covered in black fabric for a nice finish, but this works even better!
*Realized that white walls may not work. so tomorrow the walls might have to go black.
*Vinyl lettering has to go outside the room since most people can't read in the dark.
*Fluid isn't open on the weekends for coffee

But thanks to my amazing team of helpers- John for the main wall structure, Jude for showing me everything I now know about building stuff and breaking router bits, Tim and the flatmates for the pizza and D'Arcy for the lettering even though she's insanely busy and its a saturday.

The main framework going up

Lightbox testing

Cutting the timber for the frame to hold images

Wrapping frame sides in black fabric

Single image test with backing still on


I'm looking forward to tomorrow already(and REALLY should get to bed!)

p.s.. also coming along- my NEW blog site! and business cards)

Tuesday, November 10, 2009

waiting...


Everything is ready-almost-for installation.
The transparency is on the acrylic (applied tediously with water and a squeegie) and cut to the right size (by the amazing people at absolutely plastics) and now awaits installation, which will hopefully begin tomorrow.
The next step is building a support wall to house the lightboxes, and following that will be installing the photographs. At the moment I'm exploring either hanging them or fitting a frame with spacers around them to hold them in place.
I can't take the backing paper off the photographs yet so it is hard to determine the right spacing. working on it!

Friday, October 23, 2009

First two layers printed!


*still on their paper backing, and not yet mounted onto acrylic, but still, PRINTED!

Tuesday, October 20, 2009

Scaling down the big ideas

So things are on track at the moment, I have obtained the x-ray light boxes and have started to test print on adhesive backed transparency which will then be stuck on 3mm acrylic. I put out a proposal for funding which had its closure date on the 12th October, and I managed to gain enough sponsorship to cover all my costs. The price of the acrylic is higher than what I set aside for the initial PVC clear film, though I have been able to save costs in other areas (donation of light boxes from the hospital etc).

Things to do now:
-Print final images
-Attach to acrylic backing
-Plan and do scale model of wall to embed work in
-Source material to build wall and helpers who know how to use hammers
-Safety check all electronics
-Consider soundtrack?


scale plan of four light boxes and layout

Measurements of back wall of site space. The green indicates the wall I will construct to house the light boxes and images on acrylic. It frames the image, overlapping the edges slightly.

Wednesday, September 30, 2009

Plan B Projection into mist test


Projected my moving Odessa sequence into an area filled with 'fog' (using a glucose smoke machine) with a data projector set at ceiling height onto a large screen. The definition of the image was lost in the fog, though the colours and movement made for an interesting, immersive environment, but not in way i wanted; instead of being immersed in the scene, the viewer is only immersed in coloured light. I imagine that to achieve the definition of the image I would need to project onto a flat surface such as a water screen-more of an ourdoor big project but definitely something to work towards in future. for now the lightbox is taking priority and I'm trialing various printing options on transparency.

Tuesday, September 22, 2009

Light Box in SSSPACE


digitally rendered image of installation in Site space

Tuesday, September 15, 2009

Planning and presentation options- Lightbox

With two potential final works on the go right now it is all about seeing what is going to work and what isn't. When I initially chose this SITE space(painting studio) I had in mind an idea for a large lightbox in a pitch black room. The plan is for 4 x-ray boxes which will each be covered by a segment of the larger Odessa scene. The image will be layered up, the whole work being comprised of 5 or more layers on transparency. The transparency is available in a size large enough to cover each lightbox.


Proposed idea 4 x (500mm by 1470mm) lightboxes with transparency


Random lightbox ideas


The projection into a misted area is still a possibility, though perhaps a bit too big for my prescribed space. So maybe I will have to think outside the box.

Thursday, September 3, 2009

Monday, August 31, 2009

Lenticular Odessa

Looped animation of 3 frames from my Odessa Steps sequence, inspired by Three frames - which loops 3 sequential frames from a movie, thanks Rachel

Photobucket

Tuesday, August 25, 2009

Back to the Box

As a continuation of my layered light box (below left), over the past month or so I have been very interested in the idea of creating a three-dimensional space which will engage the viewer, making them feel as though they are actually in the image. I feel pictures on a wall are not enough right now, in a world where technology is advancing towards multi-dimensional viewing. Viewing, in this sense, can become an experience. This in turn also places emphasis on time and space.
After researching, and exploring stereoscopic photography, I have come to the conclusion that this is a new path altogether which I will engage with in the near future.
For now though, I will continue to work with my lightbox + layered transparencies to create a work for the end of the year which is thoroughly realised.
In relation to this I am also considering the projection of a moving image sequence onto a temporal surface, such as mist, dust, fog etc, in order to highlight the illusional characteristic of the cinema, and create an environment which viewers will freely move through.

If a billboard falls in a forest, who will hear it?

Okay, so I haven't posted in a while, and I think I should explain what I've been up to. Among other submissions and jobs on the side, I have been working on a photography proposal to the Connells Bay sculpture park on Waiheke island for a work in collaboration with Alex Lovell-Smith. The chosen artist(s) will have their work installed on a huge billboard in the middle of the sculpture park. Our idea is to address the concept of viral advertising and the consumption of natural resources. We will create ‘foot traffic’ through a forest.


working image by Emily Hlavac-Green and Alex Lovell-Smith

The final work will be composed of multiple layers. Here is a short moving image of the layers, you can see time passing as the sunlight moves across the trees...

Cityscapes from Emily Hlavac-Green on Vimeo.

Monday, August 10, 2009

Lenticular animation to give illusion of 3D space

lenticular test

I did it! I made an animated gif aka 'wiggle'!
This is created from a series of 10 images I took of a little still life, using a parallel camera set up, in which the objects sit in the zero disparity plane (the point of vergence for the camera angles) the alternative to this is toed-in verging, in which the cameras are angled to reach a common point at the centre of the object.
In a way its kind of a reverse panoramic. Rather than the image spanning 360 degrees and 'moving' around you as the viewer (or camera), you appear to move around the subject. This is also a common camera movement in cinema- having the camera pan and spin around a subject, or, as revolutionized by the Matrix, use of multiple cameras to capture a single fragment of time (a guy jumping,suspended in space) from different angles, so we can then pan all around a single moment.
Anyway, this is just a small test to examine the way we can use still imagery to give the illusion of 3D space.

Here is another wiggle I made from the two corresponding images from a Viewmaster, after scanning the disc transparencies.

Photobucket

Creative Commons License

Friday, July 31, 2009

18 Hanging Frames

As a bit of a sidenote to the what I've been trying to do with my transparencies, I decide to work outside of the box. Constrained by the small space in which i was previously trying to create some sort of illusion, moving outside into an open space and letting my frames (from a small sequence from Odessa Steps shoot) hang freely does something quite different. I then project the moving image sequence of Odessa frames onto the hanging pieces, and light cascades all around the darkened room. The frames sway and move around, viewers can also move through them too, watching the shadows and light dance on the walls, and on each other.
I think its partly immersive, partly too random for my liking. Maybe it reminds me of moving through memories? ..It looks pretty, but I am still determined to create something which reminiscent of the illusionary quality of cinema.

I want so badly to be able to create the illusion of three-dimensionality from static images.
Like being inside a giant Viewmaster maybe...

Anyway, here are some documented images of the hanging frames setup.


Creative Commons License

Monday, July 27, 2009

Scale down the town


Playing a bit here with manipulating scale, distorting space. Julia Fullerton-Batten achieves this effect though she does it through the placement of models in actual model town setups.
More images from Make Money Cheap EP release.

Monday, June 22, 2009

Midyear presentation setup pics


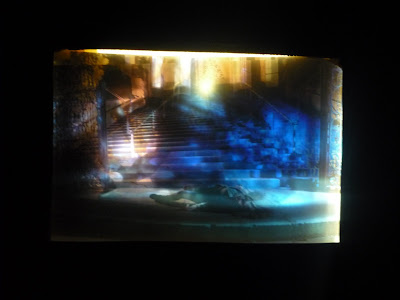
In the darkness, the installation does not matter too much. But when you take a photo of it with a flash it's obvious that things don't look too pretty. Let's just say the setup was harder than I initially anticipated and I didn't quite leave enough time to ensure everything worked according to plan.


The result was what I had hoped for though, and the image has a depth to it, kind of an illusionary television screen which is not simply 2 dimensional when being viewed up close, though appears flattened again when re-photographed (as below image). Instead of the proposed 18 sequential layers, I had to cut it down to only 6 layers, to enable enough light to shine through. Something I will work on.